Yum安装MySQL
环境准备
关闭防火墙
1
| systemctl stop firewalld && systemctl disable firewalld
|
1
| setenforce 0 && sed -i 's/SELINUX=.*/SELINUX=disabled/g' /etc/selinux/config
|
安装常用软件
1
| yum install -y wget net-tools bash-completion
|
更新软件
使用yum源安装
下载mysql安装源
1
| https://dev.mysql.com/downloads/repo/yum/
|
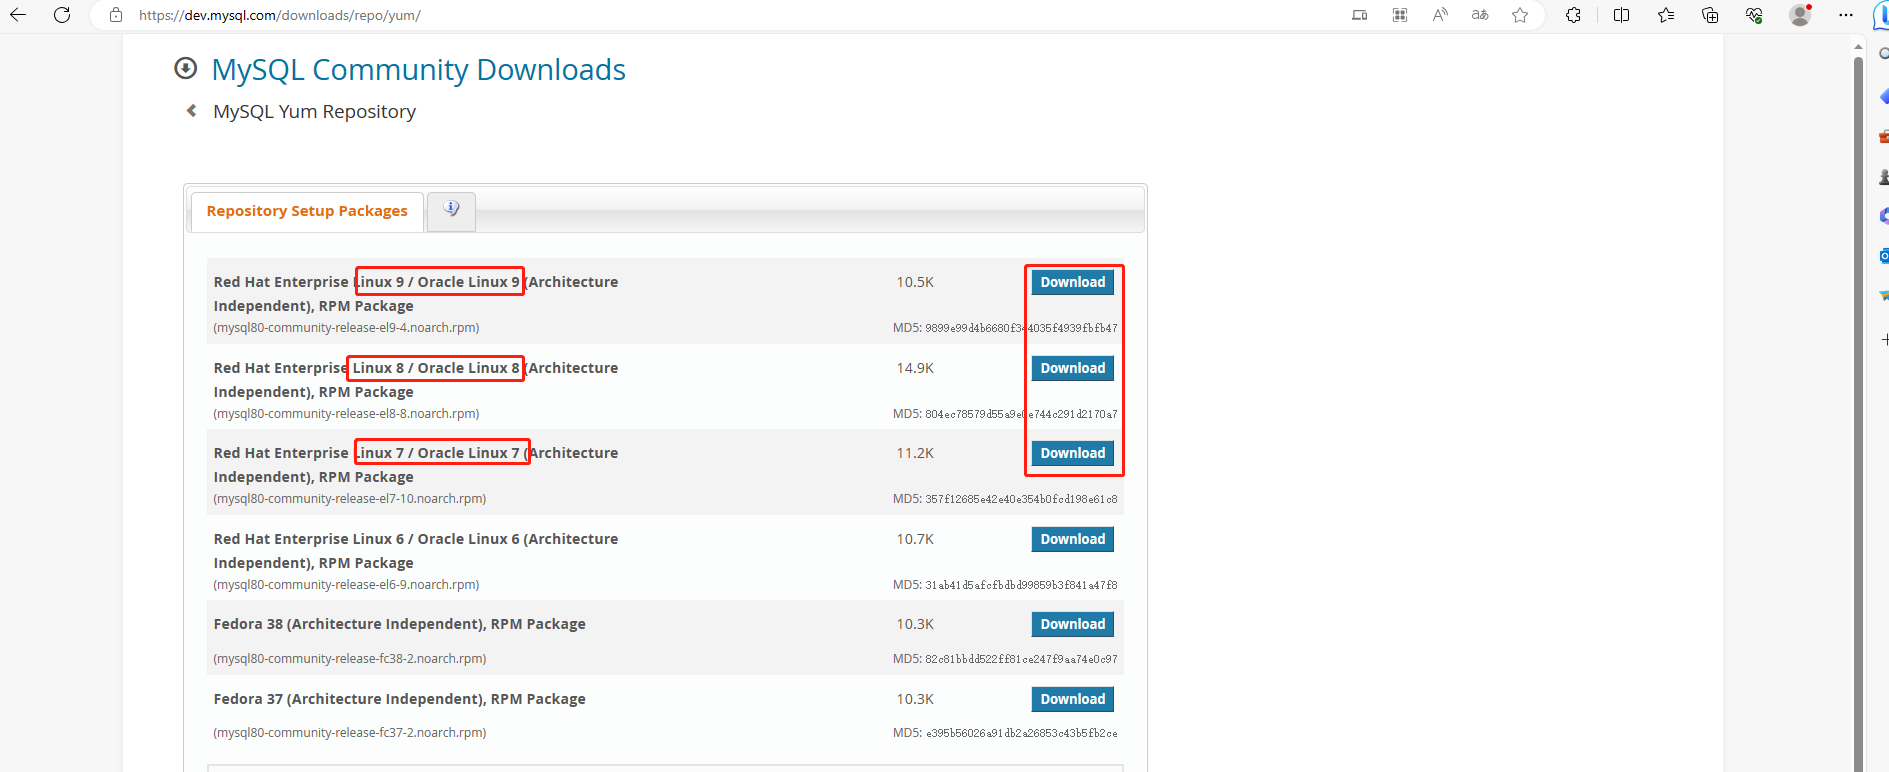
根据系统版本点击Download
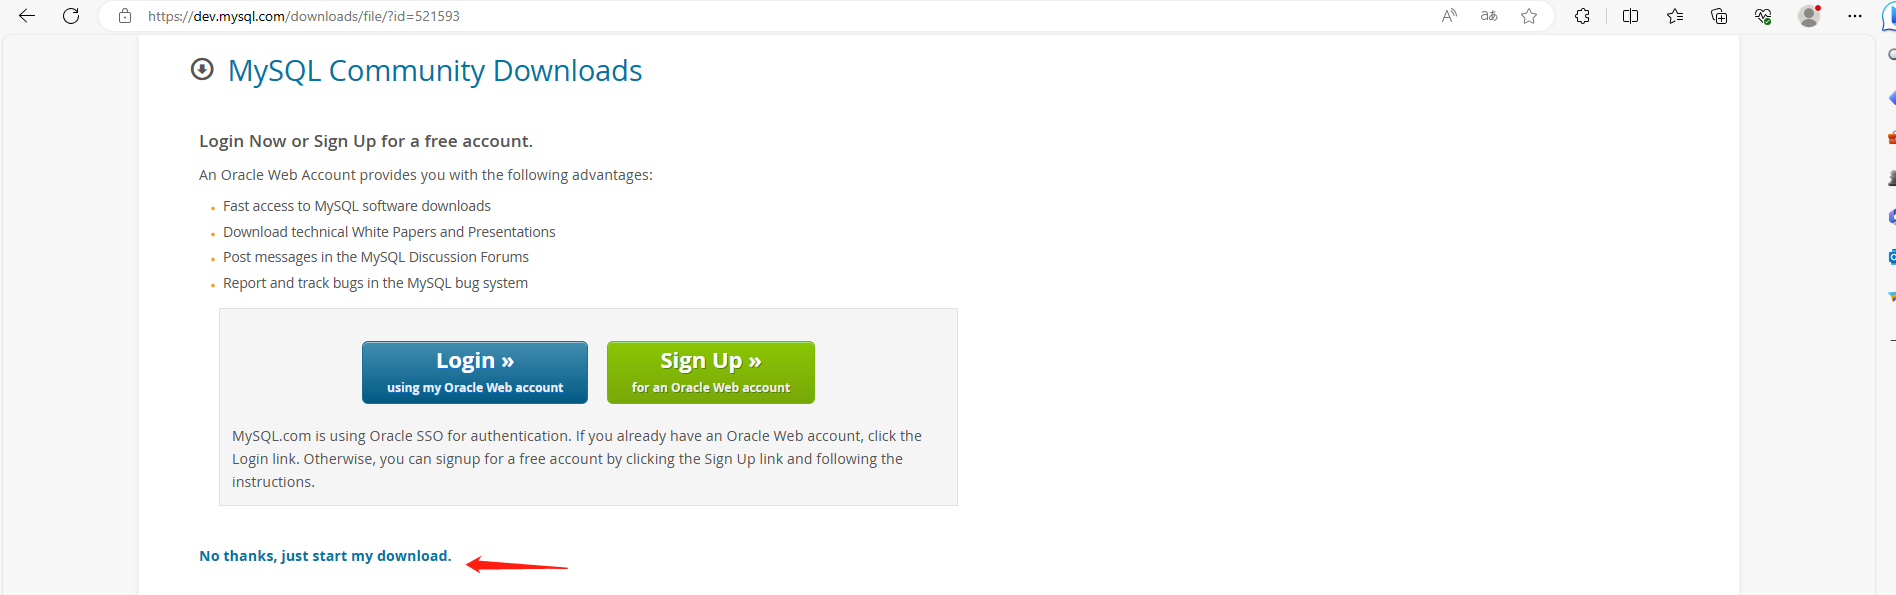
点击下载rpm包 或者右键复制链接
1
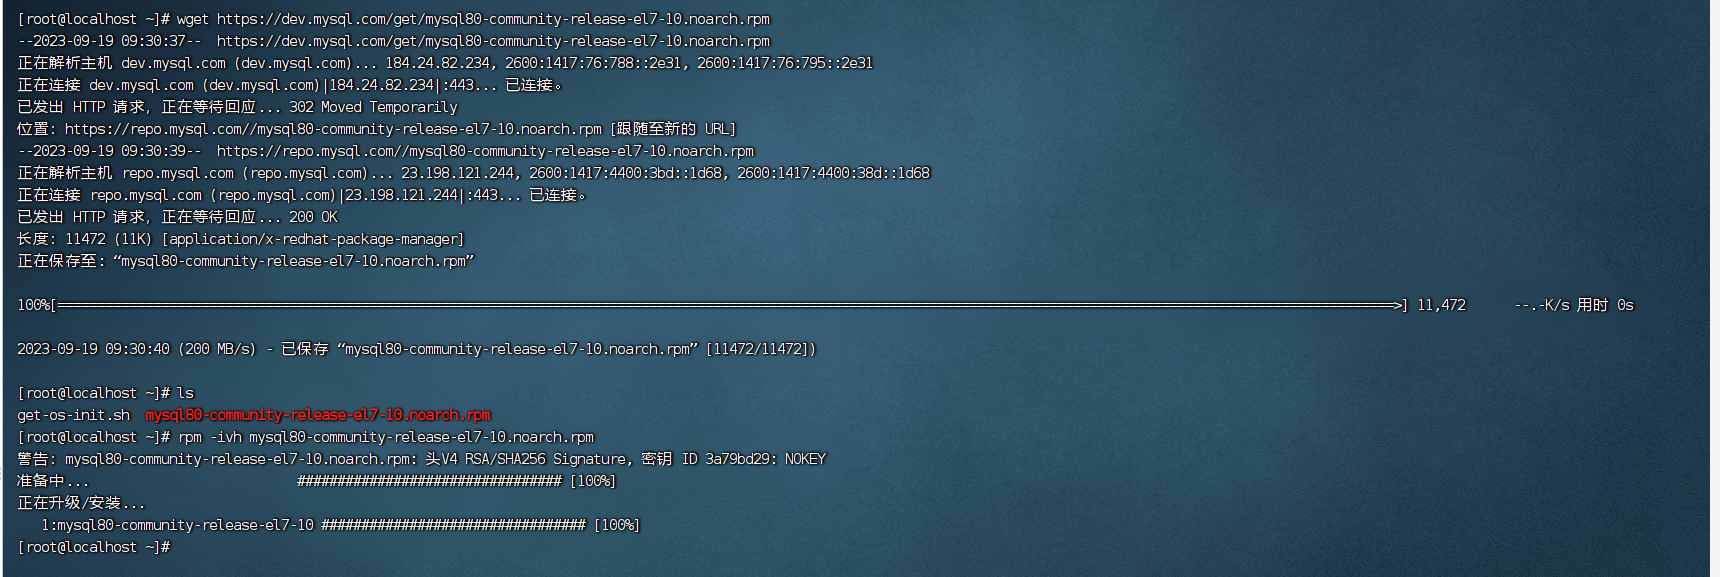
| wget https://dev.mysql.com/get/mysql80-community-release-el7-10.noarch.rpm
|
1
| rpm -ivh mysql80-community-release-el7-10.noarch.rpm
|
配置安装源
1
2
| cd /etc/yum.repos.d/
vim mysql-community.repo
|

根据需求版本号配置
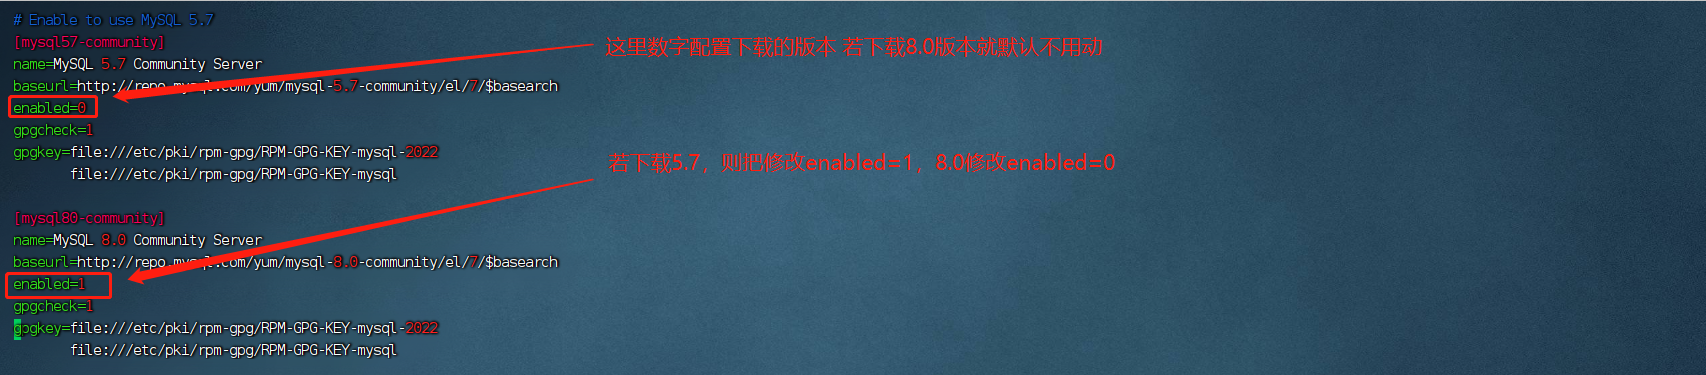
我这里直接装8.0 所以不需要修改
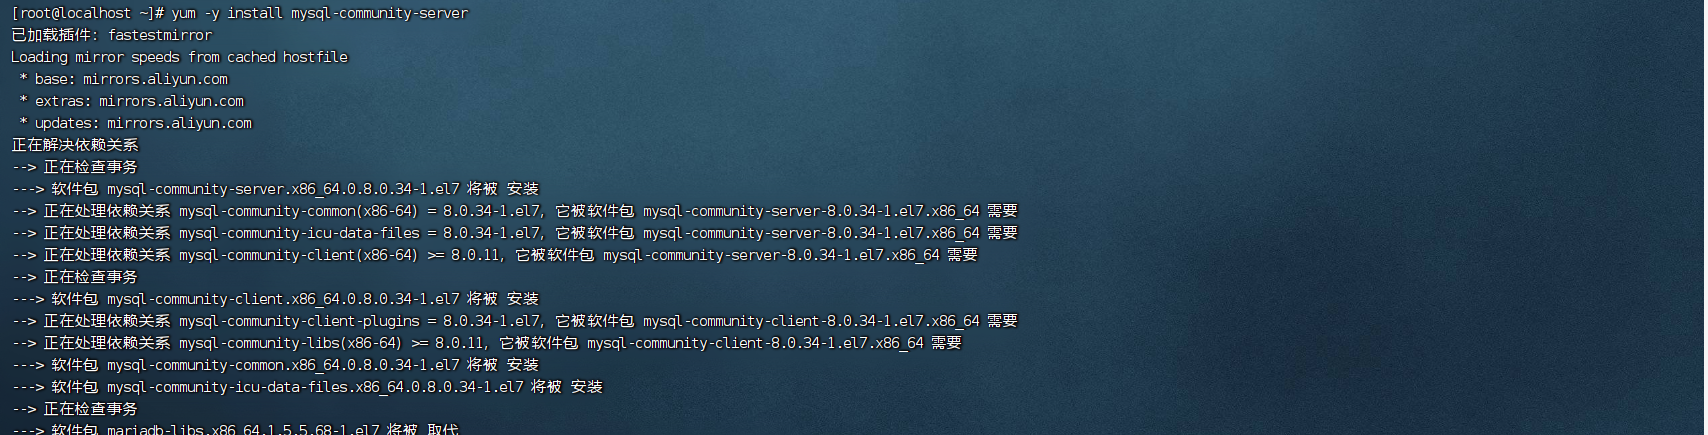
安装mysql
1
| yum -y install mysql-community-server
|
启动MySQL并设置开机自启
1
| systemctl start mysqld && systemctl enable mysqld
|
修改mysql初始化密码及权限
1
| grep password /var/log/mysqld.log
|

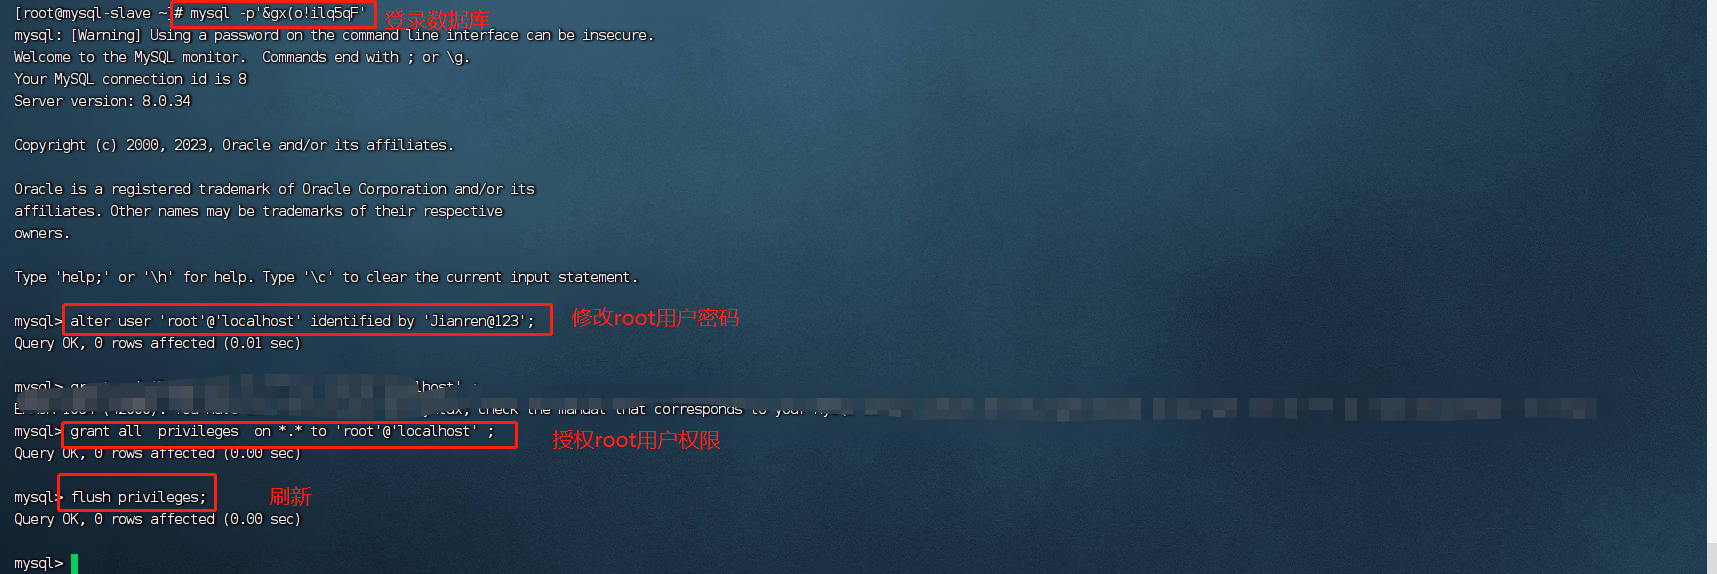
登录数据库
1
| mysql -p'密码' ##注意带特殊字符的必须要加单引号
|
配置密码及权限
1
2
3
4
| alter user 'root'@'localhost' identified by 'Jianren@123';
grant all privileges on *.* to 'root'@'localhost' ;
flush privileges;
exit ;
|
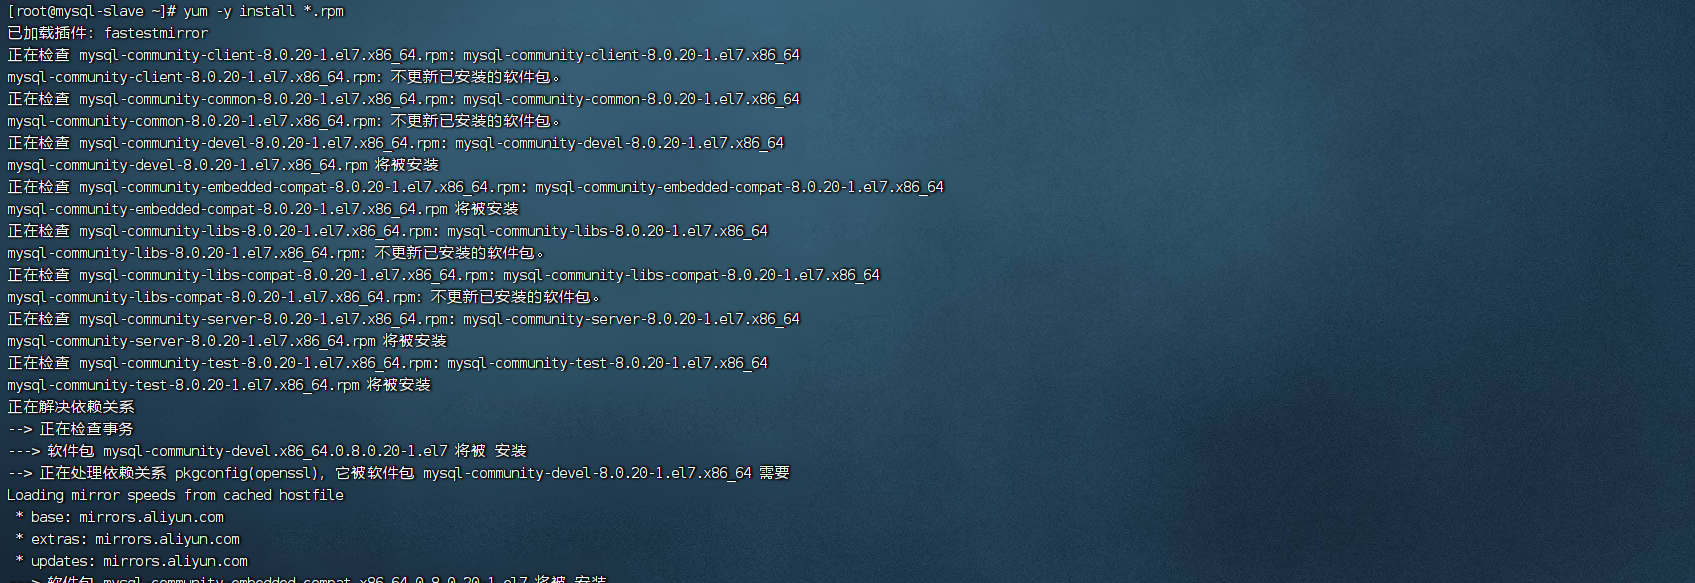
使用rpm包安装
**下载mysql rpm 安装包 。选择对应的操作系统版本 **官网地址 下载对应的rpm包
上传并解压
1
| tar xf mysql-8.0.20-1.el7.x86_64.rpm-bundle.tar
|

安装
启动MySQL并设置开机自启
1
| systemctl start mysqld && systemctl enable mysqld
|
修改mysql初始化密码及权限
1
| grep password /var/log/mysqld.log
|
登录数据库
1
| mysql -p'密码' ##注意带特殊字符的必须要加单引号
|
1
2
3
4
| alter user 'root'@'localhost' identified by 'Jianren@123';
grant all privileges on *.* to 'root'@'localhost' ;
flush privileges;
exit ;
|
使用rpm包安装配置多启动实例
**下载mysql rpm 安装包 。选择对应的操作系统版本 **官网地址 下载对应的rpm包
上传并解压
1
| tar xf mysql-8.0.20-1.el7.x86_64.rpm-bundle.tar
|
安装
配置实例
下面是单个实例
1
2
3
4
5
6
7
8
9
10
11
12
13
14
15
16
17
18
19
20
21
22
23
24
25
26
27
28
29
30
31
32
33
34
35
36
| [client]
host=127.0.0.1
[mysqld@3314]
port=3314
server_id=3314
log-bin=/home/data/mysql3314/master3314
mysqlx_port=33140
default-time-zone='+8:00'
binlog_cache_size=1M
innodb_log_file_size=512M
innodb_log_files_in_group=3
innodb_write_io_threads=4
innodb_buffer_pool_size=12G
innodb_log_buffer_size=64M
sort_buffer_size=2048K
read_rnd_buffer_size=1024K
join_buffer_size=4096K
thread_stack=384K
thread_cache_size=192
table_open_cache=2048
max_connections=400
innodb_data_file_path=ibdata1:12M:autoextend:max:1G
innodb_flush_log_at_trx_commit=2
sync_binlog=50
max_allowed_packet=256M
wait_timeout=86400
slow_query_log=1
slow_query_log_file=/home/data/mysql3314/YXT-slow.log
long_query_time=2
datadir=/home/data/mysql3314
socket=/home/data/mysql3314/mysql.sock
log-error=/home/data/mysql3314/mysqld.log
pid-file=/home/data/mysql3314/mysqld.pid
|
如需要启动多个实例则添加[mysqld@xxxx]模块
例如: 注意需要修改实例目录及端口
1
2
3
4
5
6
7
8
9
10
11
12
13
14
15
16
| [client]
host=127.0.0.1
[mysqld@3314]
port=3315
server_id=3315
log-bin=/home/data/mysql3315/master3315
mysqlx_port=33140
slow_query_log=1
slow_query_log_file=/home/data/mysql3315/YXT-slow.log
long_query_time=2
datadir=/home/data/mysql3315
socket=/home/data/mysql3315/mysql.sock
log-error=/home/data/mysql3315/mysqld.log
pid-file=/home/data/mysql3315/mysqld.pid
|
创建MySQL目录
1
2
| mkdir -p /home/data/mysql3314
chown -R mysql.mysql /home/data/mysql3314
|
启动MySQL实例
1
2
| systemctl start mysqld@3314
systemctl enable mysqld@3314
|
若需要启动多个实例修改mysql启动模块即可 mysqld@xxxx为模块名
1
2
| systemctl start mysqld@xxxx
systemctl enable mysqldxxxx
|
修改mysql初始化密码及权限
1
| grep password /home/data/mysql3314/mysqld.log
|
登录数据库
1
| mysql -p'密码' ##注意带特殊字符的必须要加单引号
|
配置密码及权限
1
2
3
4
| alter user 'root'@'localhost' identified by 'Jianren@123';
grant all privileges on *.* to 'root'@'localhost' ;
flush privileges;
exit ;
|