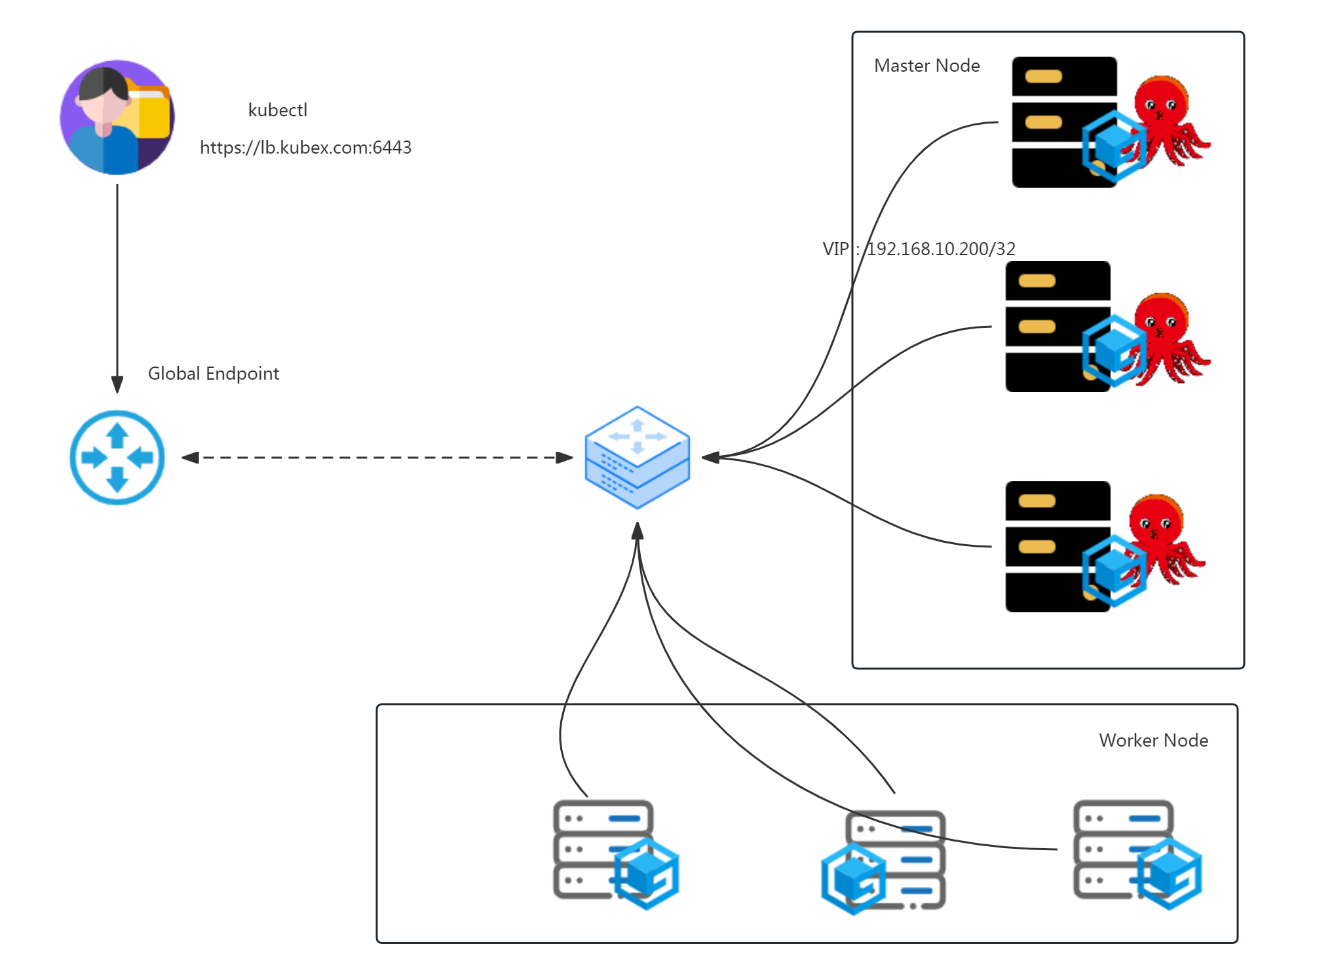
通过kube-vip实现K8S集群高可用 V1.28.5版本
软件列表及软件版本:CentOS7U9, Linux kernel 5.4,docker-ce 24.0.7,cri-dockerd v0.3.9,k8s集群为1.28.5
一、k8s集群节点准备 1.1 配置主机名 1 2 # hostnamectl set -hostname
1.2 配置主机IP地址 1 2 3 4 5 6 7 8 9 10 11 12 13 14 15 16 17 18 19 20 21 22 23 24 [root@xxx ~] [root@xxx ~] TYPE ="Ethernet" PROXY_METHOD ="none" BROWSER_ONLY ="no" BOOTPROTO ="none" DEFROUTE ="yes" IPV4_FAILURE_FATAL ="no" IPV6INIT ="yes" IPV6_AUTOCONF ="yes" IPV6_DEFROUTE ="yes" IPV6_FAILURE_FATAL ="no" IPV6_ADDR_GEN_MODE ="stable-privacy" NAME ="ens33" UUID ="063bfc1c-c7c2-4c62-89d0-35ae869e44e7" DEVICE ="ens33" ONBOOT ="yes" IPADDR ="192.168.10.16X" 修改X为当前主机分配的IP地址PREFIX ="24" GATEWAY ="192.168.10.2" DNS1 ="119.29.29.29" [root@xxx ~]
1.3 配置主机名与IP地址解析 1 2 3 4 5 6 7 8 9 10 [root@xxx ~] # cat > /etc/hosts <<EOF127.0.0.1 localhost localhost.localdomain localhost4 localhost4.localdomain41 localhost localhost.localdomain localhost6 localhost6.localdomain6192.168.10.160 k8s-master01192.168.10.161 k8s-master02192.168.10.162 k8s-master03192.168.10.163 k8s-worker01192.168.10.164 k8s-worker02192.168.10.200 lb.kubex.com
1.4 主机安全设置 1 2 3 4 5 # sed -ri 's/SELINUX=enforcing/SELINUX=disabled/' /etc/selinux/config # sestatus
1.5 时钟同步 1 2 0 */1 * * * /u sr/sbin/ ntpdate time1.aliyun.com
1.6 升级操作系统内核
所有主机均需要操作。
1 2 导入elrepo gpg keyimport https:
1 2 安装elrepo YUM源仓库# yum -y install https:
1 2 安装kernel-ml版本,ml为长期稳定版本,lt 为长期维护版本"elrepo-kernel" -y install kernel-lt .x86_64
1 2 设置grub2默认引导为0 default 0
1 2 重新生成grub2引导文件# grub2-mkconfig -o /boot/grub2/grub.cfg
1 2 更新后,需要重启,使用升级的内核生效。# reboot
1 2 重启后,需要验证内核是否为更新对应的版本# uname -r
1.7 配置内核路由转发及网桥过滤
所有主机均需要操作。
1 2 3 4 5 6 添加网桥过滤及内核转发配置文件net .bridge.bridge-nf-call -ip6tables = 1 net .bridge.bridge-nf-call -iptables = 1 net .ipv4.ip_forward = 1
1 2 3 4 查看是否加载 22256 0 151336 1 br_netfilter
1.8 安装ipset及ipvsadm
所有主机均需要操作。
1 2 安装ipset及ipvsadm# yum -y install ipset ipvsadm
1 2 3 4 5 6 7 8 9 10 配置ipvsadm模块加载方式EOF
1 2 授权、运行、检查是否加载755 /etc/ sysconfig/modules/i pvs.modules && bash /etc/ sysconfig/modules/i pvs.modules && lsmod | grep -e ip_vs -e nf_conntrack
1.9 关闭SWAP分区
修改完成后需要重启操作系统,如不重启,可临时关闭,命令为swapoff -a
1 2 3 4 5 6 7 永远关闭swap分区,需要重启操作系统# cat /etc/fstab# /dev/mapper/centos-swap swap swap defaults 0 0
1.10 配置ssh免密登录 1 2 3 4 5 6 7 8 9 10 11 12 13 14 15 16 17 18 19 20 21 22 23 在k8s-master01节点生成证书,并创建authorized_keys文件@k8s-master01 ~]@k8s-master01 X+o.. |+=.o |= ... | . ... | o+.o . S |oo+O o.. |===o+o. |O=Eo+ . |B@=ooo |
1 2 3 [root@k8s -master01 ~]# cd /root/.ssh @k8s -master01 .ssh]# ls
1 2 3 [root@k8s -master01 .ssh]# cp id_rsa.pub authorized_keys @k8s -master01 .ssh]# ls
1 2 3 4 [root@k8s -master01 ~]do 192.168 .10 .$i :/root/
二、etcd集群部署
本次在k8s-master01、k8s-master02、k8s-master03上进行etcd集群部署
2.1 在k8s集群master节点上安装etcd 1 2 3 4 # wget https://github.com/coreos/etcd/releases/download/v3.5.11/etcd-v3.5.11-linux-amd64.tar.gz # tar xzvf etcd-v3.5.11-linux-amd64.tar.gz # cd etcd-v3.5.11-linux-amd64/# mv etcd* /usr/local/bin
2.2 生成etcd配置相关文件 1 2 3 4 5 6 7 8 9 10 11 12 13 14 15 16 17 18 19 20 21 22 23 Description =Etcd Server After =network.targetType =notifyExecStart =/usr/local/bin/etcd \--name =k8s-master01 \--data-dir =/var/lib/etcd/default.etcd \--listen-peer-urls =http://192.168.10.160:2380 \--listen-client-urls =http://192.168.10.160:2379,http://127.0.0.1:2379 \--advertise-client-urls =http://192.168.10.160:2379 \--initial-advertise-peer-urls =http://192.168.10.160:2380 \--initial-cluster =k8s-master01=http://192.168.10.160:2380,k8s-master02=http://192.168.10.161:2380,k8s-master03=http://192.168.10.162:2380 \--initial-cluster-token =smartgo \--initial-cluster-state =new Restart =on-failureLimitNOFILE =65536WantedBy =multi-user.target
1 2 3 4 5 6 7 8 9 10 11 12 13 14 15 16 17 18 19 20 21 22 23 Description =Etcd Server After =network.targetType =notifyExecStart =/usr/local/bin/etcd \--name =k8s-master02 \--data-dir =/var/lib/etcd/default.etcd \--listen-peer-urls =http://192.168.10.161:2380 \--listen-client-urls =http://192.168.10.161:2379,http://127.0.0.1:2379 \--advertise-client-urls =http://192.168.10.161:2379 \--initial-advertise-peer-urls =http://192.168.10.161:2380 \--initial-cluster =k8s-master01=http://192.168.10.160:2380,k8s-master02=http://192.168.10.161:2380,k8s-master03=http://192.168.10.162:2380 \--initial-cluster-token =smartgo \--initial-cluster-state =new Restart =on-failureLimitNOFILE =65536WantedBy =multi-user.target
1 2 3 4 5 6 7 8 9 10 11 12 13 14 15 16 17 18 19 20 21 22 23 Description =Etcd Server After =network.targetType =notifyExecStart =/usr/local/bin/etcd \--name =k8s-master03 \--data-dir =/var/lib/etcd/default.etcd \--listen-peer-urls =http://192.168.10.162:2380 \--listen-client-urls =http://192.168.10.162:2379,http://127.0.0.1:2379 \--advertise-client-urls =http://192.168.10.162:2379 \--initial-advertise-peer-urls =http://192.168.10.162:2380 \--initial-cluster =k8s-master01=http://192.168.10.160:2380,k8s-master02=http://192.168.10.161:2380,k8s-master03=http://192.168.10.162:2380 \--initial-cluster-token =smartgo \--initial-cluster-state =new Restart =on-failureLimitNOFILE =65536WantedBy =multi-user.target
2.3 在k8s集群master节点上启动etcd 2.4 检查etcd集群是否正常 1 2 3 4 [root@k8s-master01 ~]# etcdctl member listname =k8s-master03 peerURLs =http://192.168.10.162:2380 clientURLs =http://192.168.10.162:2379 isLeader =false name =k8s-master02 peerURLs =http://192.168.10.161:2380 clientURLs =http://192.168.10.161:2379 isLeader =false name =k8s-master01 peerURLs =http://192.168.10.160:2380 clientURLs =http://192.168.10.160:2379 isLeader =true
三、容器运行时 Docker准备 3.1 docker安装 3.1.1 Docker安装YUM源准备
使用阿里云开源软件镜像站。
1 # wget https://mirrors.aliyun.com /docker-ce /linux/centos/docker-ce .repo -O /etc/yum.repos.d/docker-ce .repo
3.1.2 Docker安装 1 # yum -y install docker-ce
3.1.3 启动Docker服务 3.1.4 修改cgroup方式
/etc/docker/daemon.json 默认没有此文件,需要单独创建
1 2 3 4 5 6 7 在/etc/ docker/daemon.json添加如下内容"exec-opts" : ["native.cgroupdriver=systemd" ]
1 # systemctl restart docker
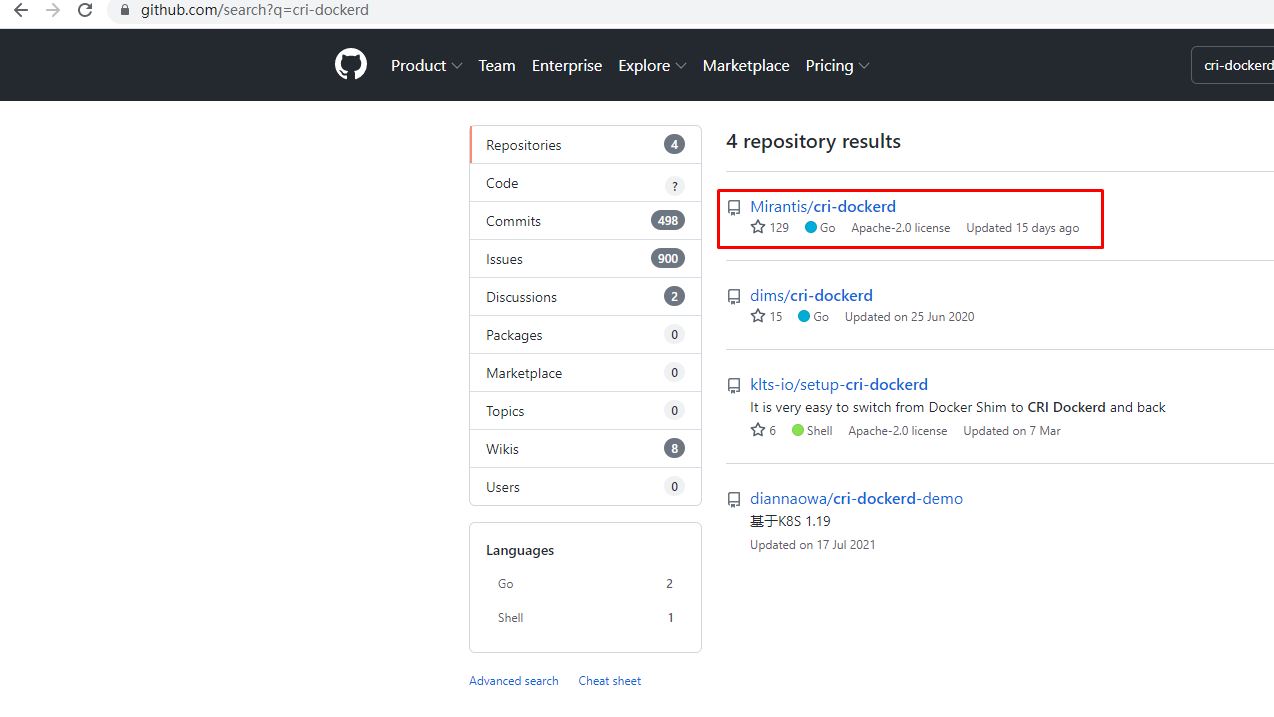
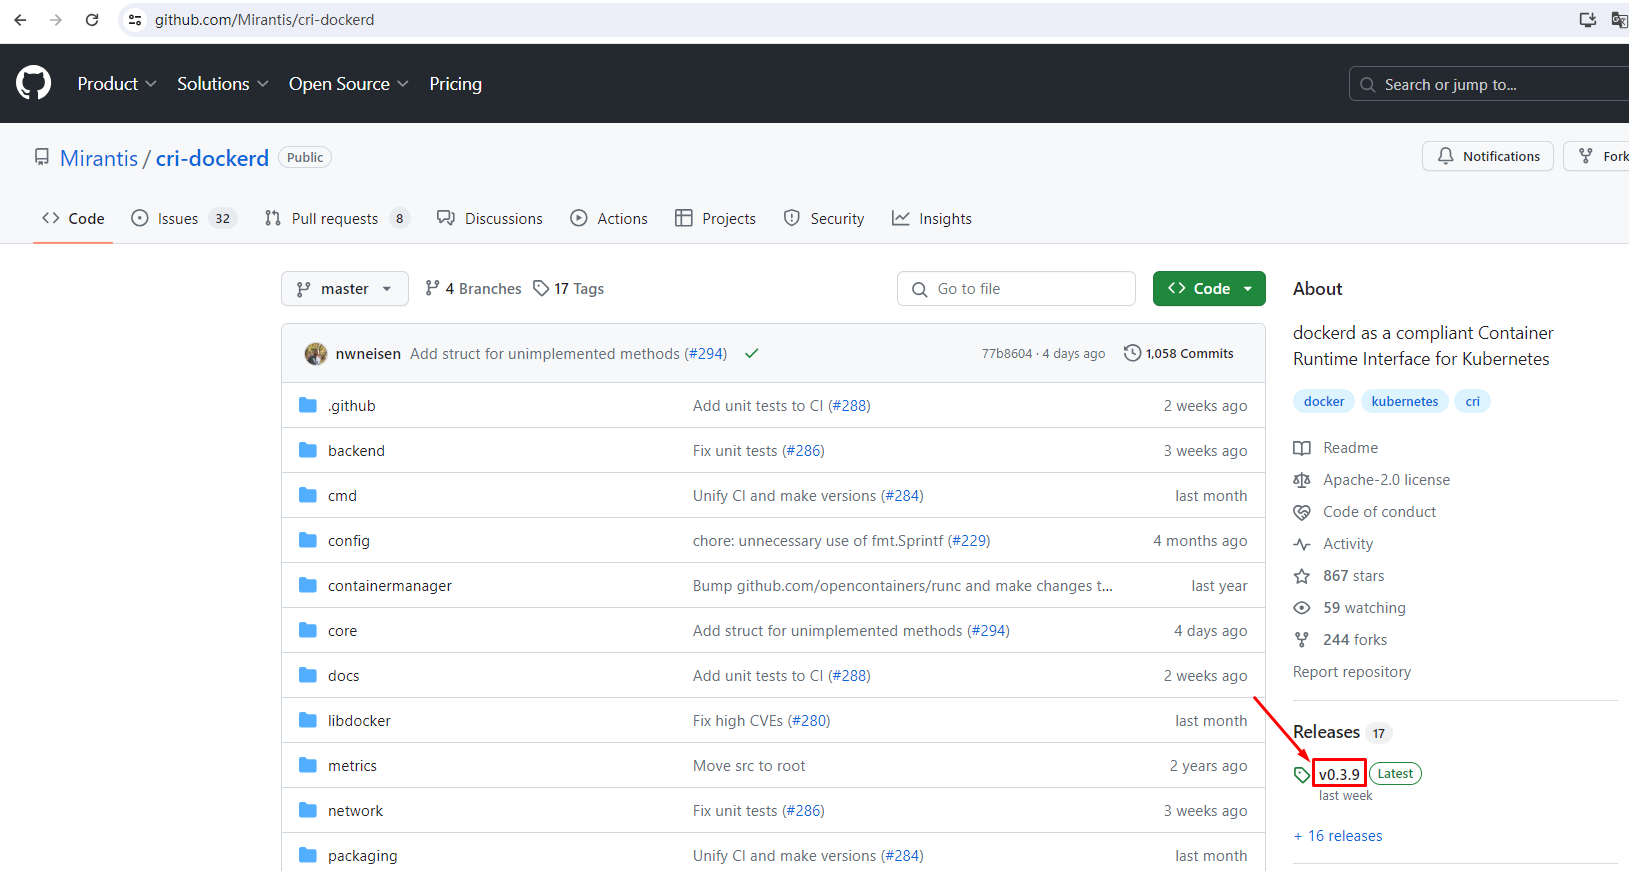
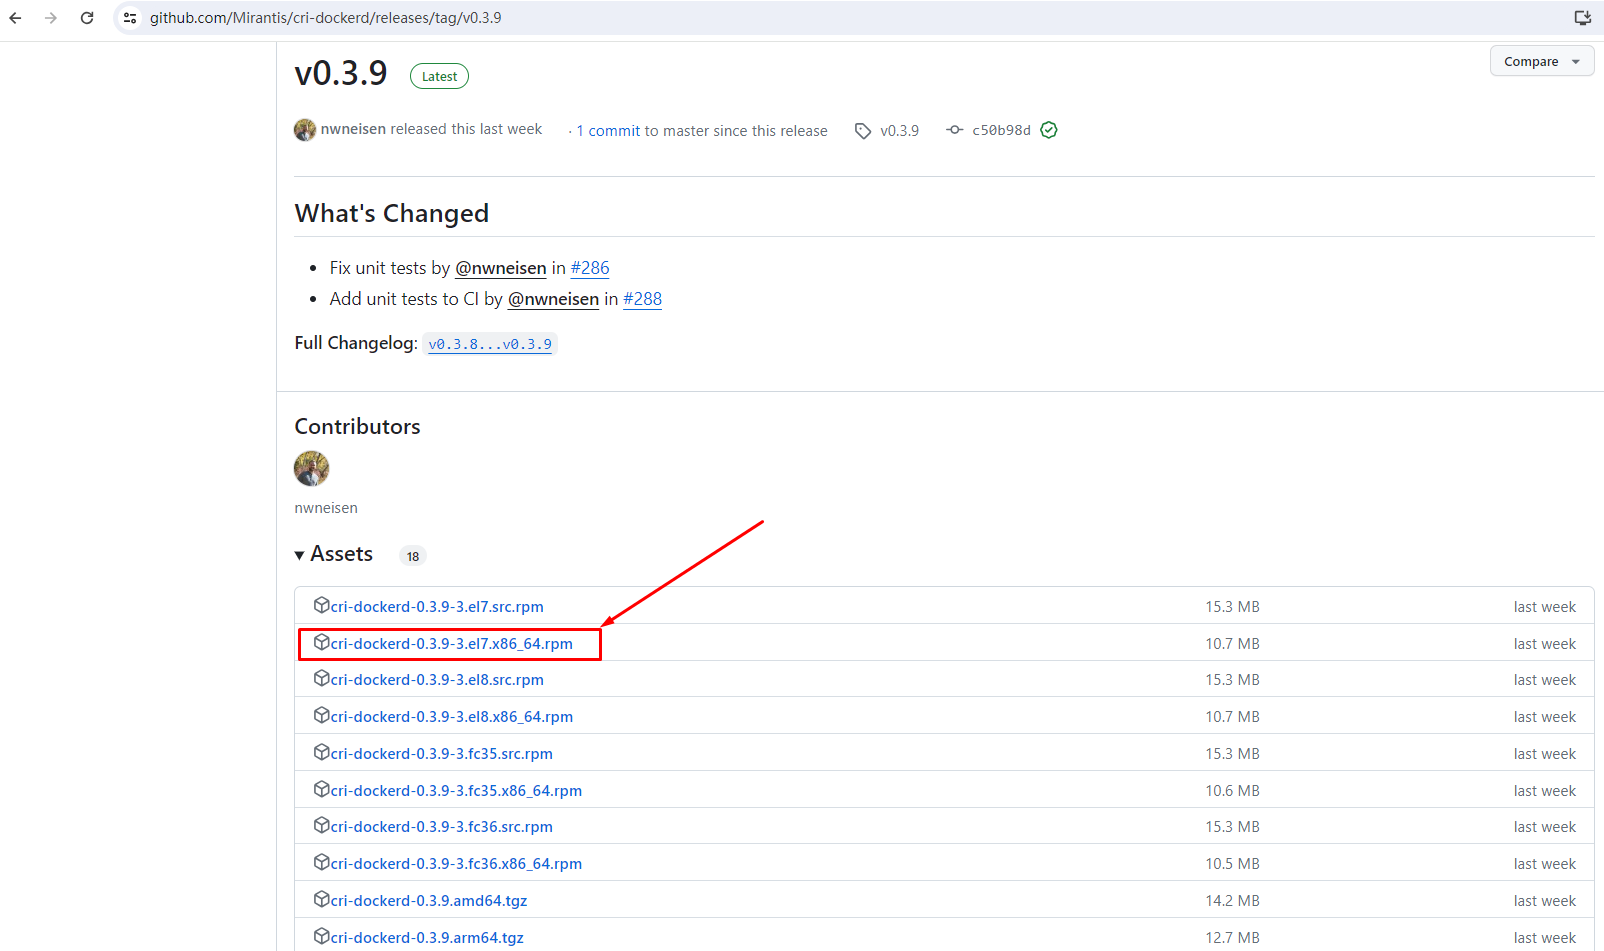
3.2 cri-dockerd安装
1 # wget https://github.com/Mirantis/cri-dockerd/releases/download/v0.3.9/cri-dockerd-0.3.9-3.el7.x86_64.rpm
1 # yum -y install cri-dockerd-0 .3.9-3 .el7.x86_64.rpm
1 2 3 4 # vim /usr/ lib/systemd/ system/cri-docker.service10 行内容/usr/ bin/cri-dockerd --pod-infra-container-image=registry.k8s.io/ pause:3.9 --container-runtime -endpoint fd:
1 2 # systemctl start cri-docker # systemctl enable cri-docker
四、K8S集群软件准备 4.1 K8S软件YUM源准备 1 2 3 4 5 6 7 8 9 Kubernetes https: //pkgs.k8s.io/core :/stable :/v1 .28 /rpm/1 1 https: //pkgs.k8s.io/core :/stable :/v1 .28 /rpm/repodata/repomd.xml.keyEOF
4.2 K8S软件安装 4.2.1 软件安装
所有节点均可安装
1 2 默认安装# yum -y install kubeadm kubelet kubectl
1 2 3 4 查看指定版本# yum list kubeadm.x86_64 --showduplicates | sort -r # yum list kubelet.x86_64 --showduplicates | sort -r # yum list kubectl.x86_64 --showduplicates | sort -r
1 2 安装指定版本-1 .28.5-150500 .1.1 kubelet-1 .28.5-150500 .1.1 kubectl-1 .28.5-150500 .1.1
4.2.2 kubelet配置
为了实现docker使用的cgroupdriver与kubelet使用的cgroup的一致性,建议修改如下文件内容。
1 2 KUBELET_EXTRA_ARGS ="--cgroup-driver=systemd"
1 2 设置kubelet为开机自启动即可,由于没有生成配置文件,集群初始化后自动启动# systemctl enable kubelet
五、kube-vip准备
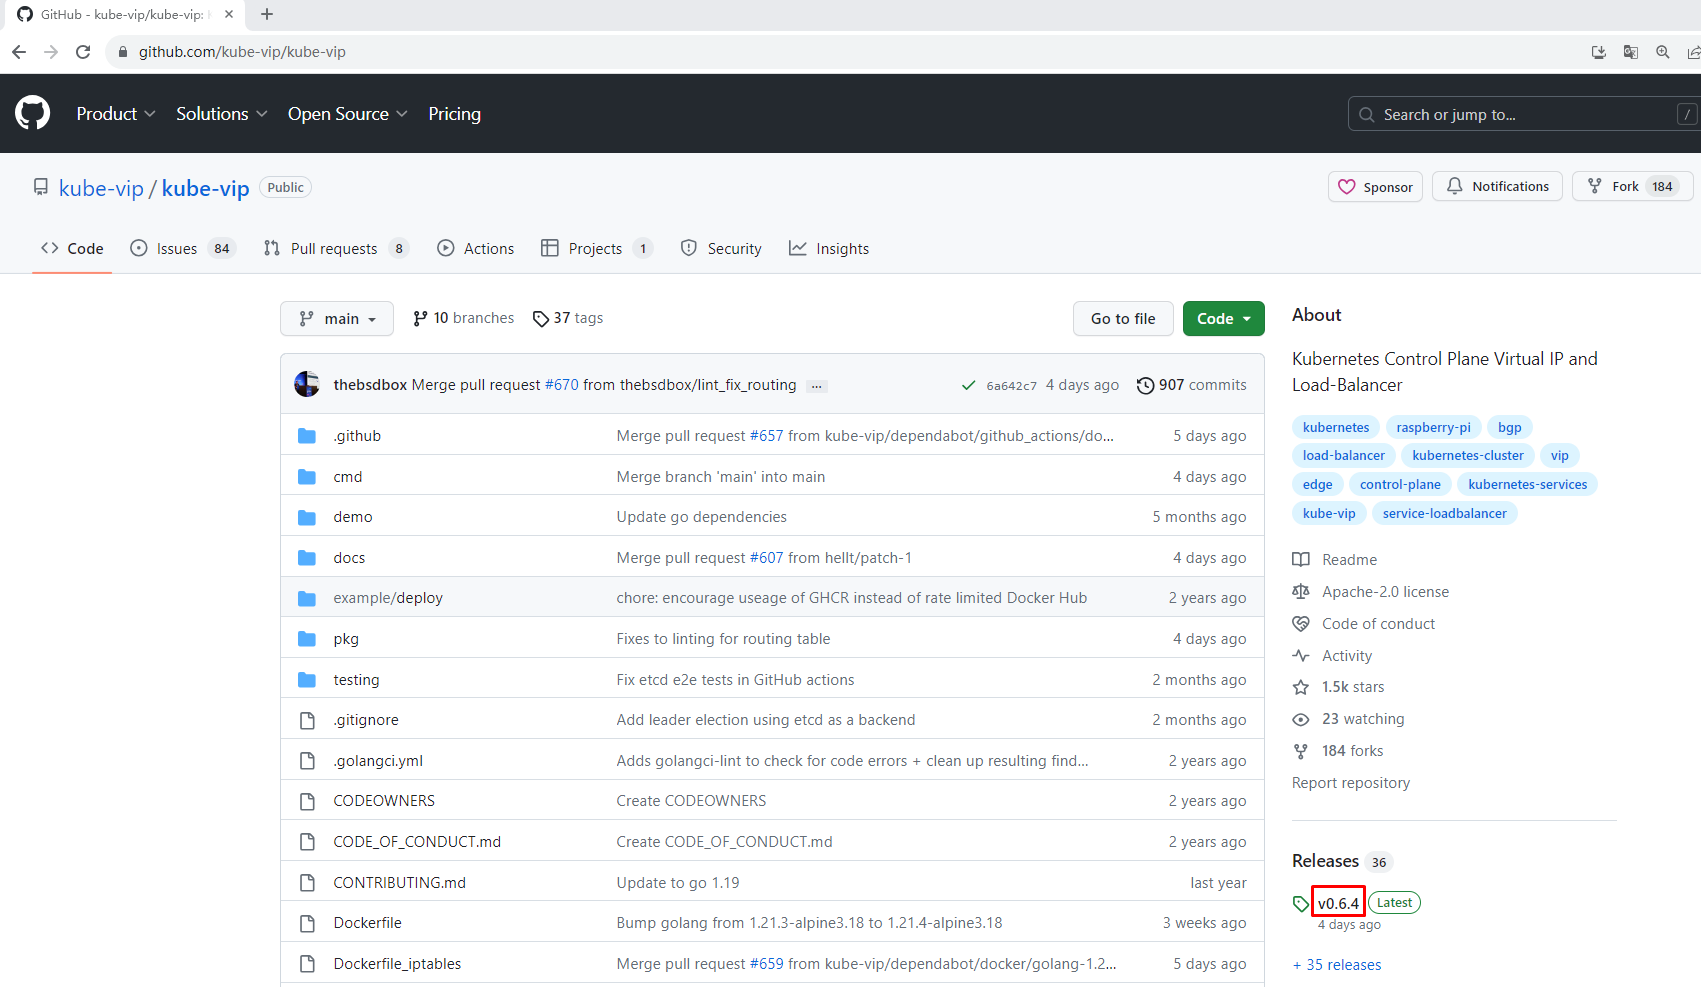
1 2 3 export VIP =192.168.10.200export INTERFACE =ens33export KVVERSION =v0.6.4
1 2 3 4 5 6 7 8 9 10 11 12 13 14 15 16 17 18 19 20 21 22 23 24 25 26 27 28 29 30 31 32 33 34 35 36 37 38 39 40 41 42 43 44 45 46 47 48 49 50 51 52 53 54 55 56 57 58 59 60 61 62 63 64 65 66 67 68 69 70 71 72 [root@k8s-master01 ~]# cat /etc/kubernetes/manifests/kube-vip.yaml apiVersion : v1 kind : Pod metadata : creationTimestamp : null name : kube-vip namespace : kube-system spec : containers : - args: - manager env : - name: vip_arp value : "true" - name: port value : "6443" - name: vip_interface value : ens33 - name: vip_cidr value : "32" - name: cp_enable value : "true" - name: cp_namespace value : kube-system - name: vip_ddns value : "false" - name: svc_enable value : "true" - name: svc_leasename value : plndr-svcs-lock - name: vip_leaderelection value : "true" - name: vip_leasename value : plndr-cp-lock - name: vip_leaseduration value : "5" - name: vip_renewdeadline value : "3" - name: vip_retryperiod value : "1" - name: lb_enable value : "true" - name: lb_port value : "6443" - name: lb_fwdmethod value : local - name: address value : 192.168.10.200 - name: prometheus_server value : :2112 image : ghcr.io/kube-vip/kube-vip:v0.6.4 imagePullPolicy : Always name : kube-vip resources : {} securityContext : capabilities : add : - NET_ADMIN - NET_RAW volumeMounts : - mountPath: /etc/kubernetes/admin.conf name : kubeconfig hostAliases : - hostnames: - kubernetes ip : 127.0.0.1 hostNetwork : true volumes : - hostPath: path : /etc/kubernetes/admin.conf name : kubeconfig status : {}
1 [root@k8s - master01 ~ ]# scp /etc/ kubernetes/manifests/ kube- vip.yaml k8s- master02:/etc/ kubernetes/manifests/
1 [root@k8s - master01 ~ ]# scp /etc/ kubernetes/manifests/ kube- vip.yaml k8s- master03:/etc/ kubernetes/manifests/
六、K8S集群初始化 6.1 k8s集群容器镜像准备
可使用VPN实现下载。
1 # kubeadm config images pull --kubernetes-version=v1.28.5 --cri-socket=unix:
1 2 3 4 5 6 7 8 9 10 11 12 13 14 15 16 17 images_list ='registry .k8s.io/kube-apiserver:v1.28 .5 registry .k8s.io/kube-controller-manager:v1.28 .5 registry .k8s.io/kube-scheduler:v1.28 .5 registry .k8s.io/kube-proxy:v1.28 .5 registry .k8s.io/pause:3 .9 registry .k8s.io/etcd:3 .5 .9 -0 registry .k8s.io/coredns/coredns:v1.10 .1 'for i in $images_listdo docker pull $idone docker save -o k8s-1 -28 -5 .tar $images_list
6.2 K8S集群初始化配置文件准备 6.2.1 查看kind默认配置 1 # kubeadm config print init-defaults
6.2.2 生成配置文件样例 kubeadm-config.yaml 1 2 3 4 5 6 7 8 9 10 11 12 13 14 15 16 17 18 19 20 21 22 23 24 25 26 27 28 29 30 31 32 33 34 35 36 37 38 39 40 41 42 43 44 45 46 47 48 49 50 51 52 53 54 55 56 57 58 59 60 61 62 63 64 65 66 67 68 69 70 71 72 73 74 75 76 77 78 79 80 81 82 83 84 85 86 87 88 89 90 91 92 93 94 95 96 97 98 99 100 101 102 103 104 105 106 107 108 109 110 111 112 113 114 [root@k8s-master01 ~ ]--- apiVersion: kubeadm.k8s.io/v1beta3 bootstrapTokens: - groups: - system:bootstrappers:kubeadm:default-node-token token: abcdef.0123456789abcdef ttl: 24h0m0s usages: - signing - authentication kind: InitConfiguration localAPIEndpoint: advertiseAddress: 192.168 .10 .160 bindPort: 6443 nodeRegistration: criSocket: unix:///var/run/cri-dockerd.sock imagePullPolicy: IfNotPresent name: k8s-master01 taints: null --- apiServer: timeoutForControlPlane: 4m0s certSANs: - lb.kubex.com - k8s-master01 - k8s-master02 - k8s-master03 - k8s-worker01 - k8s-worker02 - 192.168 .10 .160 - 192.168 .10 .161 - 192.168 .10 .162 - 192.168 .10 .163 - 192.168 .10 .164 controlPlaneEndpoint: lb.kubex.com:6443 apiVersion: kubeadm.k8s.io/v1beta3 certificatesDir: /etc/kubernetes/pki clusterName: kubernetes controllerManager: {}dns: {}etcd: external: endpoints: - http://192.168.10.160:2379 - http://192.168.10.161:2379 - http://192.168.10.162:2379 imageRepository: registry.k8s.io kind: ClusterConfiguration kubernetesVersion: 1.28 .5 networking: dnsDomain: cluster.local serviceSubnet: 10.96 .0 .0 /12 podSubnet: 10.244 .0 .0 /16 scheduler: {}--- apiVersion: kubeproxy.config.k8s.io/v1alpha1 bindAddress: 0.0 .0 .0 bindAddressHardFail: false clientConnection: acceptContentTypes: "" burst: 0 contentType: "" kubeconfig: /var/lib/kube-proxy/kubeconfig.conf qps: 0 clusterCIDR: "" configSyncPeriod: 0s conntrack: maxPerCore: null min: null tcpCloseWaitTimeout: null tcpEstablishedTimeout: null detectLocal: bridgeInterface: "" interfaceNamePrefix: "" detectLocalMode: "" enableProfiling: false healthzBindAddress: "" hostnameOverride: "" iptables: localhostNodePorts: null masqueradeAll: false masqueradeBit: null minSyncPeriod: 0s syncPeriod: 0s ipvs: excludeCIDRs: null minSyncPeriod: 0s scheduler: "" strictARP: true syncPeriod: 0s tcpFinTimeout: 0s tcpTimeout: 0s udpTimeout: 0s kind: KubeProxyConfiguration logging: flushFrequency: 0 options: json: infoBufferSize: "0" verbosity: 0 metricsBindAddress: "" mode: "ipvs" nodePortAddresses: null oomScoreAdj: null portRange: "" showHiddenMetricsForVersion: "" winkernel: enableDSR: false forwardHealthCheckVip: false networkName: "" rootHnsEndpointName: "" sourceVip: "" EOF
6.3 使用初始化配置文件初始化集群第一个master节点 1 2 3 4 5 6 7 8 9 10 11 12 13 14 15 16 17 18 19 20 21 22 23 24 25 26 27 28 29 30 31 输出以下内容,说明初始化成功。start using your cluster, you need to run the following as a regular user:if you are the root user, you can run:a pod network to the cluster."kubectl apply -f [podnetwork].yaml" with one of the options listed at :https ://kubernetes.io/docs/concepts/cluster-administration/addons/any number of the control-plane node running the following command on each as root :6443 the certificate-key gives access to cluster sensitive data, keep it secret!a safeguard, uploaded-certs will be deleted in two hours; If necessary, you can use"kubeadm init phase upload-certs --upload-certs" to reload certs afterward.any number of worker nodes by running the following on each as root :6443
6.4 准备kubectl配置文件 1 2 3 mkdir -p $HOME /.kubesudo cp -i /etc/kubernetes/admin.conf $HOME /.kube/configsudo chown $(id -u):$(id -g) $HOME /.kube/config
6.5 加入其它K8S集群master节点 1 2 3 4 kubeadm join lb.kubemsb .com :6443 --token abcdef.0123456789 abcdef \--discovery-token-ca-cert-hash sha256:d2e611304c8f0277c9228378d5d2d1776970f638e90d9482444946a0b2ad3343 \--control-plane --certificate-key 7 bcb6b9e1571631f2349de1972519120830882b27debaa5de62bbd460bccba37 \--cri-socket unix:
1 2 3 mkdir -p $HOME /.kubesudo cp -i /etc/kubernetes/admin.conf $HOME /.kube/configsudo chown $(id -u):$(id -g) $HOME /.kube/config
1 2 3 4 5 [root@k8s-master01 ~]# kubectl get nodescontrol -plane 6 m39s v1.28 .5 control -plane 67 s v1.28 .5 control -plane 28 s v1.28 .5
6.6 加入worker节点 1 2 kubeadm join lb.kubemsb .com :6443 --token abcdef.0123456789 abcdef \--discovery-token-ca-cert-hash sha256:d2e611304c8f0277c9228378d5d2d1776970f638e90d9482444946a0b2ad3343 --cri-socket unix:
1 2 3 4 5 6 7 [root@k8s-master01 ~]# kubectl get nodescontrol -plane 26 m v1.28 .5 control -plane 5 m6s v1.28 .5 control -plane 3 m2s v1.28 .5 68 s v1.28 .5 71 s v1.28 .5
6.7 网络插件calico部署及验证
使用calico部署集群网络
安装参考网址: https://projectcalico.docs.tigera.io/about/about-calico
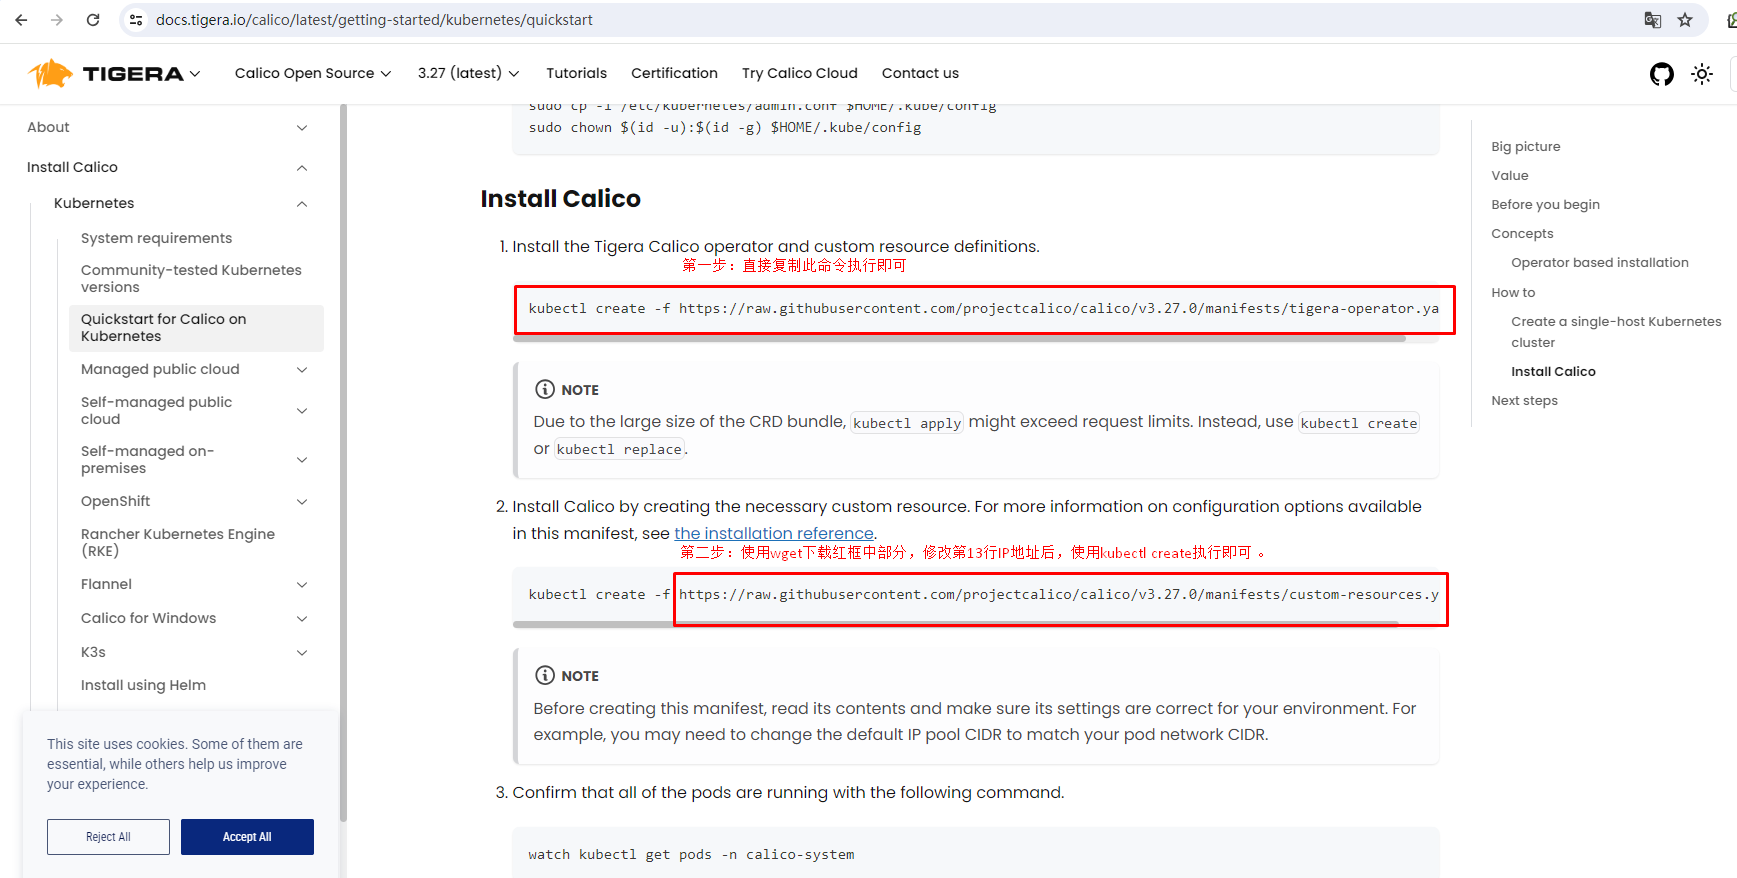
1 2 应用operator 资源清单文件# kubectl create -f https:
1 2 通过自定义资源方式安装- master01 ~]# wget https :
1 2 3 4 5 6 7 8 修改文件第13行,修改为使用kubeadm init ----pod-network-cidr对应的IP地址段...... 11 ipPools: 12 - blockSize: 26 13 cidr: 10.244.0.0/16 14 encapsulation: VXLANCrossSubnet ......
1 2 应用资源清单文件@k8s -master01 ~]# kubectl create -f custom-resources.yaml
1 2 监视calico-sysem命名空间中pod运行情况
**Wait until each pod has the **STATUS of Running.
1 2 3 4 5 6 7 [root@k8s-master01 ~]# kubectl get nodescontrol -plane 54 m v1.28 .5 control -plane 49 m v1.28 .5 control -plane 48 m v1.28 .5 29 m v1.28 .5 29 m v1.28 .5
